- melt butter over medium heat and add spices and granulated sugar and stir until well combined and dissolved
- add the agave nectar and stir, followed by the sweetened condensed milk and stir and finally the pumkin purée and keep stirring constantly (to avoid sticking and burning)
- cook over medium-high heat for 10 minutes and keep stirring until a bubbles form on the surface and the mixture thickens (to the consistency of thick peanuts butter) and keep cooking and stirring for another 5 minutes
- remove from heat and transfer to a bowl, set aside and let cool
- refrigerate overnight until firm
- when firm and chilled, melt some butter (for your hands, molds and tray covered with waxed paper) and brush everything with melted butter (especially your fingers and palms)
- using your fingers, scoop out the soft caramel and roll into large walnut-sized balls in between your palms and place onto the buttered waxed paper until you have 30 balls
- either freeze the caramel balls (as they are) or press them into flexible silicone buttered mini-molds (my moulds have 15 cavities each that are 2 cm deep and 4 cm wide) and then freeze the balls until firm
- when ready to begin coating with the chocolate, melt 1/3 (or 100 grams) of the dark chocolate with 1 tbsp coconut oil, in a double-boiler
- remove frozen caramels from the freezer, in small batches of 10, and brush chocolate only on the top surface and place back inside the freeze until hardened, continue with the next batches
- for the first full chocolate coating, remelt your previous chocolate (if any has remained) and add another 100 grams of chocolate and 1 tbsp coconut oil
- remove the frozen caramels in small batches of 10 at a time, use a 2-pronged fork (or skewers assembled with tape to make a 2-pronged fork) and place the caramels, with the first chocolate-coated side down, on the fork and dip into the chocolate, let the excess drip off and/or brush off excess from the underside and place back on a tray covered in a new sheet of waxed paper and let harden and freeze again
- for a smoother finish and thicker chocolate coating, dip one final time, remelt the remaining chocolate, add the last third of the chocolate (100 grams dark chocolate + 1 tbsp coconut oil + 1 pinch of salt) and re-dip the frozen chocolate-coated caramels in the melted chocolate, let excesss chocolate drip off or brush it off from the underside and place back on a tray covered with a new sheet of waxed paper (un-buttered)
*note : if too much chocolate forms around the base, you can use a thin spatula to unstick them from the waxed paper (before the chocolate completely solidifies) and replace them on another clean sheet of waxed paper
- refreeze and serve chilled
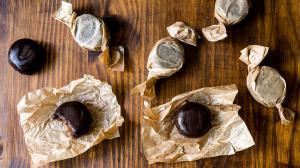
- the chocolate coated caramels can be individually wrapped in square pieces of waxed paper (my waxed paper squares measured 15 X 15 cm each) and place them in an air-tight container in the freezer.
did you like ? share it !
Comments ? Questions ? Send me an email using the contact section below !